

App Settings
App Settings holds everything that is true of this device — not of your store, and not of your account. Open it from the drawer menu → Account → Settings, or — while working the register — from the POS drawer footer → App Settings, so you never have to leave POS to flip a scanner or floor-plan toggle.
These settings do not sync
Every switch on this screen is stored on the device you change it on. Turning
on dark mode on the counter tablet does not turn it on for the phone in
the back office, and reinstalling the app resets them all. That is deliberate
— a tablet mounted at the register and a manager's phone want different
layouts.
Settings that should be the same everywhere — tax, receipts, order
behaviour, opening hours — live in Configurations → Preferences and are
shared by every device in the store.
General
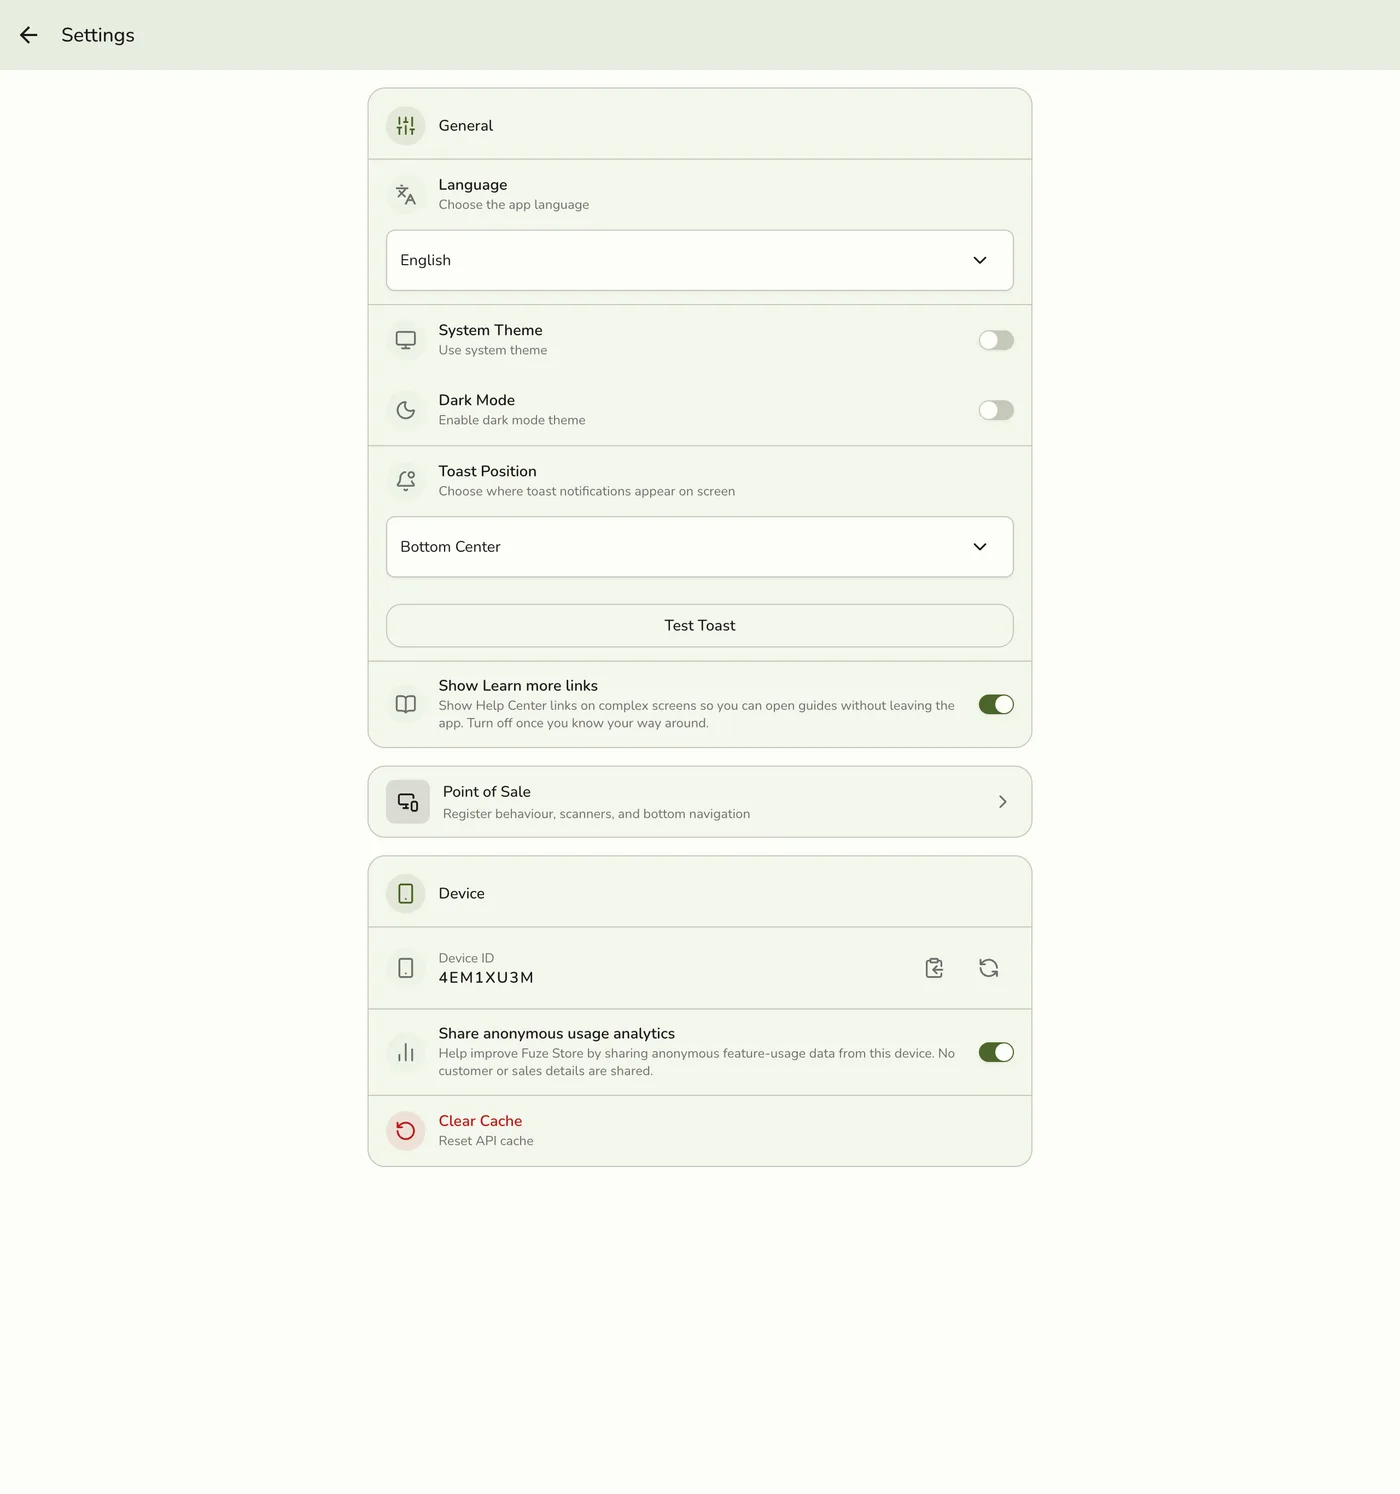
Language, appearance, and the small in-app helpers.
| Setting | What it does |
|---|---|
| Language | The app language for this device — see below. Staff on the same store can each run the app in a different language |
| System theme | Follow the phone or tablet's own light/dark setting |
| Dark mode | Force dark mode. Only applies when System theme is off |
| Toast position | Where pop-up messages appear on screen |
| Test toast | Fires a sample message so you can check the position |
| Show Learn more links | Puts small Help Center links on the more complex screens, so you can open the matching guide without leaving the app |
Language
The app is available in English, Japanese, Simplified Chinese and Traditional Chinese, plus English variants for teams used to Indian or American wording. Only languages that are ready to use appear in the list.
Changing the language changes the words on screen and nothing else. Your prices stay in pesos, your day still closes on Philippine time, and tax is still calculated under Philippine rules. This is deliberate: the app is built for businesses trading in the Philippines whose staff read another language — not for selling in another country. A Japanese restaurant in Manila runs the app in Japanese and still prints a Philippine receipt.
You can set a language two ways, and they work together:
| Where | Who it affects |
|---|---|
| Preferences → Store | Everyone. The default language for every device in the store — set it once instead of on each terminal |
| Settings → General → Language (this screen) | Just this device. Overrides the store default |
So a store can run in Japanese while one cashier keeps their own terminal in English. Once you pick a language on a device it stays picked — a store-wide change will not overwrite it, and it survives signing out.
If you never choose one, the app follows the phone or tablet's own language, and falls back to English.
A language that is still being translated will show some screens in English.
Those languages are hidden from the list until they are complete, so anything
you can pick is ready to use.
Dark mode is worth setting deliberately on a mounted register — a bright screen in a dim room is harder to read than a dark one, and vice versa. On a tablet mounted low, moving toasts to the top keeps them out from under the cashier's hand.
Leave Show Learn more links on while you are learning the app. Turn it off once your team knows their way around and the links are just clutter.
Point of Sale
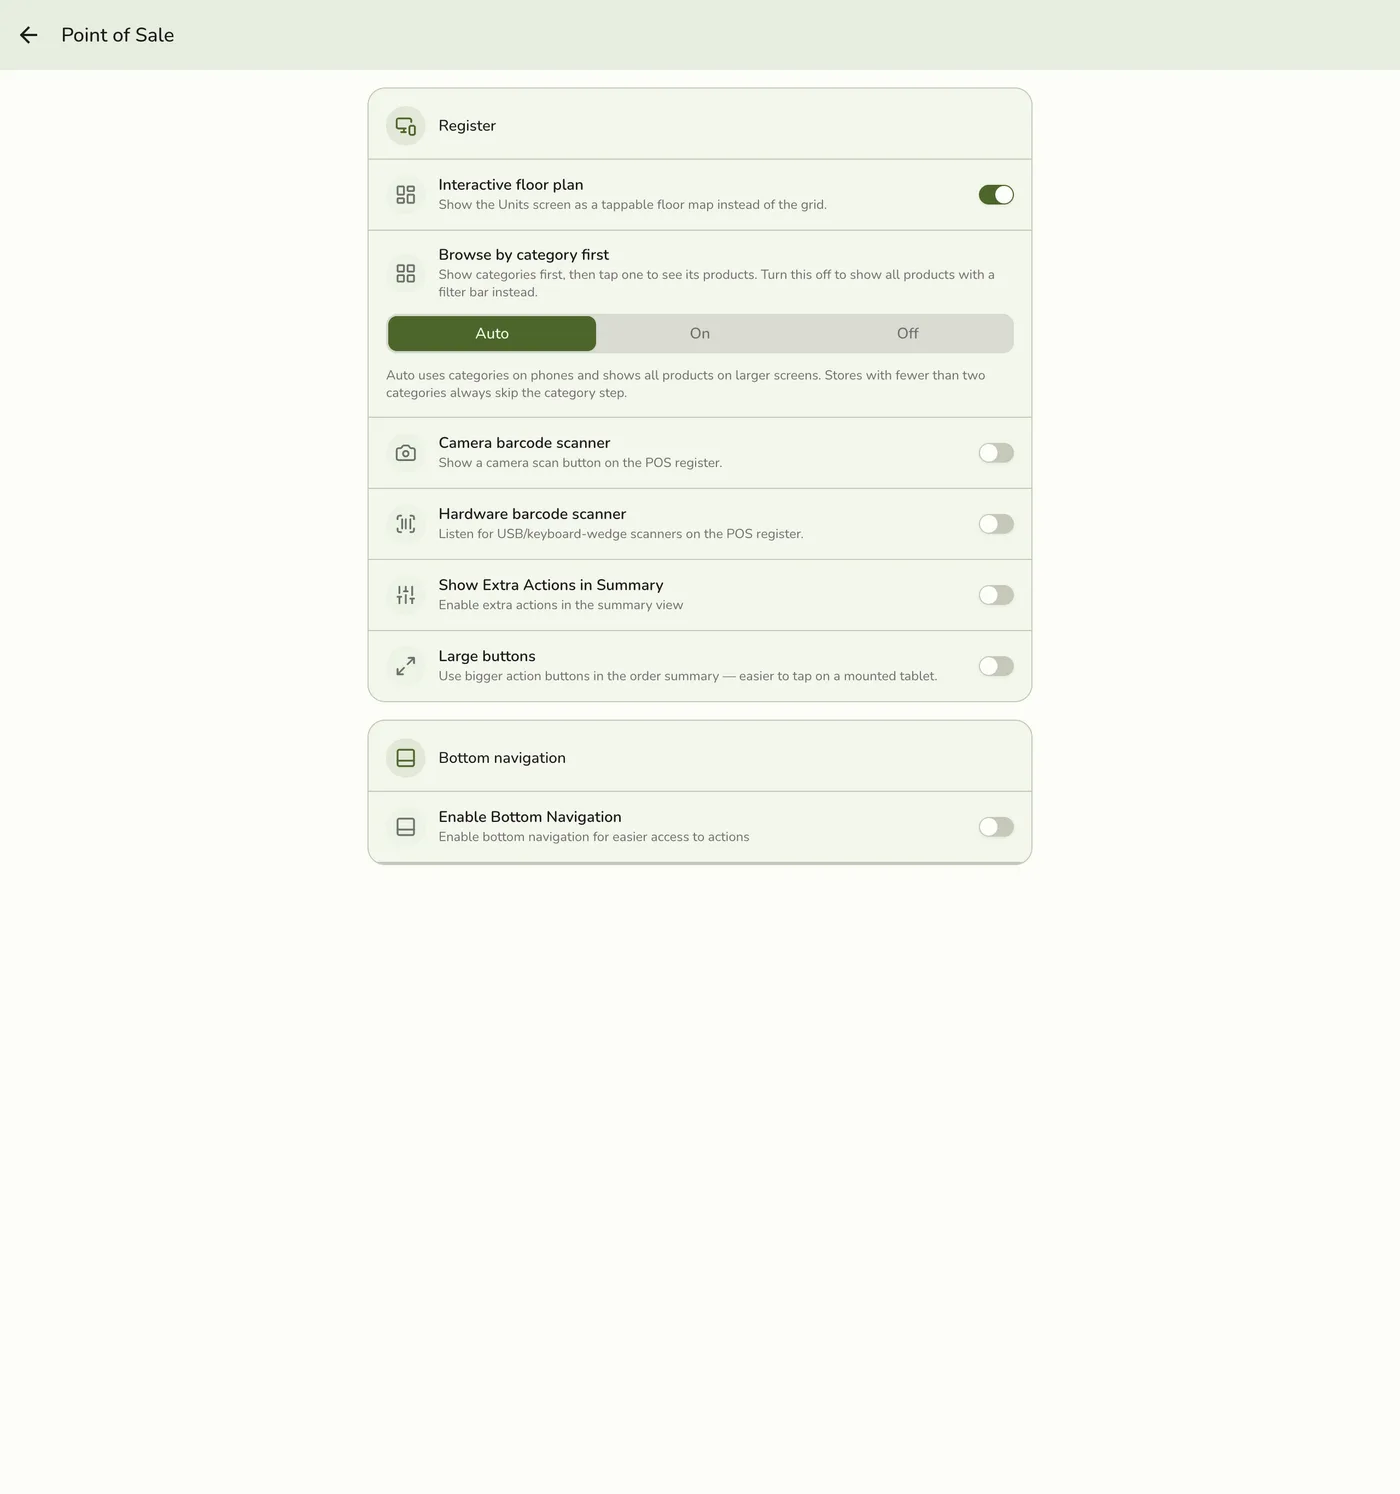
Point of Sale opens its own screen — it has enough settings to be worth keeping apart from the rest. Tap the row to open it.
Register
How the register itself behaves. Some rows only appear when they apply to you.
| Setting | What it does | Shown when |
|---|---|---|
| Interactive floor plan | Show the Units screen as a tappable floor map instead of the grid | Your store has the Floor Plan add-on |
| Browse by category first | Show categories first, then tap one to see its products | Always |
| Camera barcode scanner | Show a camera scan button on the register | Always |
| Hardware barcode scanner | Listen for a USB or keyboard-wedge scanner | Web only — see below |
| Show extra actions in summary | Adds the extra action buttons to the order summary | Always |
| Large buttons | Bigger action buttons in the order summary — easier to tap on a mounted tablet | Always |
Both scanners are off by default
Turn on Camera barcode scanner to scan with the device camera. Turn on
Hardware barcode scanner if you have a plug-in scanner that types like a
keyboard.
The hardware option appears only in the web app, because a USB
keyboard-wedge scanner can only be listened for in a browser. On a phone or
tablet, use the camera scanner instead.
Scanning behaves the same everywhere in the app — a product barcode adds to the cart, an order or claim QR opens that order, a queue ticket opens the queue entry. See Scanning QR Codes & Barcodes.
Bottom navigation
The optional action bar along the bottom of the register. The bar takes up to a quarter of the screen — when there are more actions than fit, they scroll inside it.
| Setting | What it does | Shown when |
|---|---|---|
| Enable bottom navigation | Adds a bottom action bar to the register | Always |
| Persistent bottom navigation | Keep the bottom bar always open. When off, swipe or tap the handle to show or hide it | Bottom navigation is on |
| Initially open | Start with the bottom bar open | Bottom navigation is on and not persistent |
Device
Everything about this device itself — how it is identified, what it shares, and what it has cached.
Device ID
A short identifier used to tell your devices apart. Tap it to copy, or use the regenerate action to mint a new one.
Regenerating the Device ID unpairs this terminal
If your store uses the Staff Operations add-on, the Device ID is what a
paired terminal is registered under. Generating a new one drops that pairing,
and a manager has to register the device again before it can be used as a
terminal.
Only regenerate when you are told to — for example after cloning a device
image, where two devices ended up sharing an ID.
Share anonymous usage analytics
Controls whether this device sends anonymous feature-usage data back to us.
What is and is not shared
Only anonymous signals about which features get used — never customer names,
order contents, sales figures, or any other store data. Turning it off stops
this device from sending anything. It has no effect on how the app works.
Clear cache
Empties this device's local copy of store data and re-fetches everything from the server.
Nothing is deleted — your orders, products, and settings live on the server. Reach for it when a screen keeps showing data you know is stale and a pull-to-refresh has not fixed it.
Not the same as signing out
Clearing the cache keeps you signed in and keeps this screen's settings. It
only drops cached data.
Related guides
- Store Preferences — the settings that do apply to every device
- App Information
- Scanning QR Codes & Barcodes
- Pairing Terminals
- Live Floor on POS